


|
|
|
In order to use the Jump commands, we must first have done something to cause the flag to be affected. This can be an addition or subtraction or any of a whole range of things. But let's look at the CMP mnemonic. This stands for the word "CoMPare". For example:
CMP EAX, 100
This would compare whatever is in the EAX register with the value 100. If the two are equal, the zero flag will be set. You might wonder at this - surely it should be clear if they are equal. However, what happens is that a "pretend" SUB is done in the background, causing the flag to be set if zero is the result. Strange, but there you are. Anyway, how does this help us? Well, it means that using the CMP mnemonic, we can get the CPU to move around the program when we combine it with jump instructions.
Jump instructions are concerned with moving to a different part of the code based upon the status of a specific flag. For example, we might jump to a particular label if the Carry flag is set. If it is not set, we would simply move on to the next mnemonic following the jump instruction in the code.
Very soon, we will revisit the pegObject routine to expand it a little further using by adding an extra parameter to the call. You see, the  problem with the routine as it stands at the moment, is that although it can peg any obejct passed to it, it can only peg it at the bottom right of the screen. What if we wanted to peg it to the bottom left or top right? So, what we will do is to add another parameter to specify which of the four cardinal points we want our object pegged to. Then we will compare this value with our codes for the different positions and calculate the new co-ordinates accordingly. Smart. Note that, at the moment, we will only peg to the four corners but later on we will also peg to the centre points as well, giving us 9 possible locations. We'll use the 9-point system (using the values in the illustration on the right) from the start even although we don't know how to centre anything yet. That means we will be using the values 0, 2, 6 and 8. Later in this chapter, we'll discuss the SHIFT operations and see how we can easily divide by 2, allowing us to calculate "centred" positions.
In the following tables, taken from Jeremy's help manual, you will find all the jump mnemonics listed. It does look like a lot of material but, remember, we will still adhere to our normal approach of using only those which help us in our example code and leave the rest for later study when we have developed some serious skills.
| Instruction | Alternative | Action |
|---|---|---|
| JZ | JE | Jump if zero flag set (jump if equal) |
| JNZ | JNE | Jump if zero flag not set (jump if not equal) |
| JC | JB or JNAE | Jump if carry flag set (jump if "below" or not above or equal) |
| JNC | JNB or JAE | Jump if carry flag not set (jump if not "below" or above or equal) |
| JA | JNBE | Jump if neither carry flag or zero flag set (ie. jump if "above" or if not "below" or equal). See note for JNA below. |
| JNA | JBE | Jump if either carry flag or zero flag set (ie. jump if "not above"
or if "below" or equal). This is useful to check after a subtraction that
a register remains above 1. For example, you might use this in protective
coding as follows (where EDI is at the end of a string in BUFFER):-
MOV EDX,ADDR BUFFER SUB EDI,EDX ;get length of string in EDI JNA >.error ;length found to be negative or zero |
| JP | Jump if parity flag set | |
| JNP | Jump if parity flag not set | |
| JECXZ | Jump if ECX=0 | |
| JCXZ | Jump if CX=0 |
| Instruction | Alternative | Action |
|---|---|---|
| JS | Jump if sign flag set (jump if signed number is negative) | |
| JNS | Jump if sign flag not set (jump if signed number is positive) | |
| JO | Jump if overflow flag set | |
| JNO | Jump if overflow flag not set | |
| JL | JNGE | Jump if sign and overflow flags are different (jump if "less" or "not greater or equal"). This special test is necessary for numbers regarded as signed because JA (jump if above) and JB (jump if below) do not work with such numbers. For example if AL is 1 then CMP AL,-1 will not cause JB to jump since the carry flag is not set. But JL will jump because (regarded as signed) -1 is less than 1. |
| JNL | JGE | Jump if sign and overflow flags are the same (jump if "not less" or "greater or equal"). See note above for JL. |
| JLE | JNG | Jump if sign and overflow flags are different and zero flag is set (jump if "less or equal" or "not greater") |
| JLNE | JG | Jump if sign and overflow flags are the same and zero flag is clear (jump if "not less or equal" or "greater") |
Improving the "peg" handler - step 3
We already know how we want to improve the "page" handler - we want to be able to specify one of 4 possible position for the object within the
The first thing we need to change is the actual call to the "pegObject" routine. Not only does it now have an additional parameter but there are 4 objects to "peg" and not just one as before, so our "OnResize" handler should look like this:
There should be no big surprises here - we invoke the "pegObject" routine, pass it the address of the window (using the square brackets convention), give the name of the object to be pegged (using the "IDC" reference) and then tell it at which of the four corners that particular object is to be pegged. That's the easy bit - now we have to work out how to handle each of these instructions!
Let's start with the actual "signature" of the routine - only one thing has changed, remember. We'll call this new value "pegPosition" but the initial steps of setting up the local variables, getting the object's handle and then the size of the window's client area remain the same:
OK, now we turn to the new parameter. We need to move the peg position value into one of the registers and, since Eax is currently employed, we should move the contents of "pegPosition" into Ebx:
We're now in a position to do something about the user's request to position an object at one of the four positions. What we are going to do is to repeatedly compare Ebx with the known values 0, 2, 6 and 8. Each time, if we find the zero flag set, we will jump to an appropriate label where the code for that pegging operation will be found. That means the
Now, here's the thing - in assembler, we can either jump forward or backwards and, in general, backwards jumps are more efficient. For that reason, if we simply say
So, let's make 4 labels in our code at the end of the "OnResize" handler:
Go back to the point just after the point where we store the pegPosition in Ebx and put in the
You don't actually have to indent the jump statements. I did that to make the relationship between the compares and the associated jumps.
Let's now turn to an important point. What would happen if the user passed the value "7" or "9" to the pegPosition routine? It would fail each one of these comparisons which means that after the last "Jz" it would move on to the next statement, which would be the first of the labels we defined above. That means it would execute the code for pegging the object at position "0". This is obviously not what we would want so we really need to put a statement after the last jump which would cause us to leave the routine if such a condition occurred:
Note that you should return a "False" value because now that we understand comparisons and jumping, we can check for this flag whenever we have called the pegPosition routine to see if it succeeded or not and to handle a failure in some elegant fashion.
OK. Let's now turn our attention to the chunks of code which actually do the pegging.
Position 0
Pegging an object to Position 0 is really simple - it's at the top left of the client area so we simply have to offset it from 0,0 by the amount of border we want, say 4:
None of that should pose problems for you but note the "True" in the Return statement to indicate success. Properly speaking, this is not really good enough. Either (or both) the
Position 2
Position 2 is at the top right of the window. That means that the "y" value of the object is the same as if it had been pegged to position 0. The "x" value is just as we had it in the previous version of pegPosition - we take the width of the object, add the border value to it and then subtract the result from the width of the client area. So, taking the "x" or "left" position first, we would have:
Position 6
What do we have to do to place something at position 6? Since it is at the bottom left of the window, the "left" co-ordinate is the same as for position 0 and the "top" position of the object is as we had it in the previous version of the routine - take the height of the object, add the border and subtract the result from the height of the client area:
Position 8
And lastly we come to our old friend - position 8. This is the one we used in our previous version of pegPosition. It's at the bottom right of the screen, so we have to work out both the "left" and "top" positions arithmetically:
Putting it all together
And that's it, except for the
Long jumps and short jumps
When you compiled the code, did it work? Probably not - I'll bet that you got a warning that your jump to "position_8" was more than 127 bytes away and your were then given an idea of by how much. That is because goAsm tries to store the length of the jump in a single signed byte. So, we can jump 127 bytes forward and a maximum of 128 bytes backwards. During the compilation, goAsm has worked out how far it is from that jump to the required label and discovered that it is not possible, using a single byte.
We will therefore have to use 2 bytes to store the problematic jump. It's very simple to do - instead of using the "greater than" sign, we use two of them:
Note that you should try to keep the other jumps as single symbols since the use of a single byte instead of two lets your program run much faster in certain circumstances. Recompile it and this time, when you resize the window by dragging it with the mouse, you should see the sort of effect shown in the animation here.
Improving the "peg" handler - step 4
In the last chapter, I spoke about the dangers of using "magic numbers" but you will have noticed that I have done just that in the code we have just been dissecting. I have used the number "4" to represent the border. How could we remove this and make the code more flexible? We could add another parameter to the pegPosition routine which would allow us to pass the actual size of the border we wanted. That means each of the four buttons in the example above could have a different border size.
So, I want you to change the signature of the routine by adding a new parameter - let's call it "pegBorder" - and then change the code to use this variable instead of the "4" we used earlier. What else will we have to do? We'll have to go back to our "OnResize" handler and cgange the calls to pegPosition to include the new parameter. If you get really stuck, click here to see my solutions for the OnResize and pegPosition routines. Click the "back" button on your browser to return here.
Shifting things around
Let's now think about how we could get some buttons pegged to the centre of the screen - vertically, horizontally or both. How would we do it? Let's take the example of putting at button at the top centre of the window. The "top" value is easy - we just place it at 0 + pegBorder, as we have seen, but what about the "left" value? We would:
Well, none of that is difficult, except for the "divide by 2" bit. That we don't know how to do. If you've been doing a bit of research, you might have noticed that there are
What would happen if we "shifted" the numbers one place to the left? The "2" would now be in the thousands box, the "5" would be in the hundreds and the "6" would now be in the tens. That would leave "0" in the units, giving us the situation below:
We now have the number 2,560. We have multiplied it by 10 because 10 is the number base.
What would happen if we shifted everything one place to the right? Firstly, we'd lose the "6" but we can catch it in a "register" (the same happens if we shift something to the left and there is a number in the leftmost "box") and everything else would be divided by a value equal to the number base.
Of course, we don't have to shift things just one place to the right or left. We can shift any number of places in either direction. What would be the effect of shifting 256 three places to the left? Yes, we would multiply it by 103, or 1,000.
The SHR and SHL mnemonics
In assembler, we perform these shifts by means of the
And that's all there is to it. In a later chapter, we'll take a look at multiplying and dividing by numbers other than 2 but for now that's all we need to get moving on our learning.
Improving the "peg" handler - step 5
Now for the big one. We have pegged 4 buttons simultaneously but we're moving on to handling 9 of them
That didn't hurt, did it? Now we need to go to the pegPosition routine itself and to amend the "compare and jump" code to include the extra locations:
That means, of course that you will now have to put in all the new labels in the subsequent code. All of the new buttons (with the exception of "btn4") have one of their co-ordinates against the border of the window and is therefore easy to calculate using the approach we have used before. As for the other co-ordinates, I have already explained how to do it - calculate the position as if it was on the far side or bottom of the window and then divide by 2. But remember - you don't need to add the border to those co-ordinates which are centred.
At any rate, this is another little exercise I want you to try out for yourself. So, complete the pegPosition code and, if you're stuck, check here for the full example.
Click handlers
Knowing how to shift bits around helps us in another way - we can now handle button clicks. The Windows message is
Make yourself a window like the one shown here. Make the captions as shown with two buttons called "btn1" and "btn2" The idea is that when a button is clicked, it will display an appropriate message in the caption bar of the window, such as "You clicked Button One!!!".
So, we now have the window, the buttons and the event message. Let's now turn to the "onClickBtn" handler code. The first thing is to do is to use the
We know that hWnd represents our winMain and the uMsg is the
Now, we know that the lower 16 bits of wParam represent the ID of the control. Our two buttons have IDs of
You can see from the fragment above that we compare the contents of Ax sub-register against the ID of Button 1. If the Zero Flag is not set, we know it isn't that button and we jump to the label called ".notButton1" where we compare Ax with the ID for Button 2. This time, if the Zero flag is clear, we jump to our third label where we exit from the routine, since the user has clicked something which is neither of the buttons. However, you must remember to put "Returns" in the code as shown to prevent a successful comparison from executing "too much" code. For example, imagine that we clicked Button 1. In the first comparison, the Zero Flag will be set. We will not jump to ".notButton1". Instead, we will execute the code which we have not shown yet. But what stops the program from going on and then executing the code which follows the ".notButton1" label? The Return(TRUE) which we have placed before that label, is the answer.
OK, so we're in the right "leg" of the branch. How do we compare the upper 16 bits of the Eax register to find out whether it was a click, a double-click, a right-click, etc? Well this is where the shoft commands come in - all we have to do is to shift Eax 16 bits to the right and the top 16 will be shifted into the place currently occupied by the lower 16. Then, all we have to do is to do a
Now that you understand procedures, jumps and shifts, you have enough knowledge to start taking on little assignments. I'd like you to take the pegPosition routine one final stage further. There are many reasons for using procedures and a key one is to remove repetitious code. If you look at our "pegObject.asm" module, you'll see that there are several areas where the code is doing the same thing - centring the "left" co-ordinate, placing a control at the top of the screen, for example. I want you to separate out the repeating code, make them procedures and use the
Once again, that's all for this session. There was a lot to think about here and always remember that I only deal with just enough from these areas to get you learning. There are plenty of reference books and files out there for all the last bit of detail. That's not my purpose. Survival skills - that's what we're learning here. In the next session, I will be taking a long hard look at loops - the syntax, the usage and some examples. We'll be including some of the material we've learned up to this point in the game, so you're in for some interesting stuff.
In this session, we have looked at the sort of flags which exists inside our CPU to indicate changes in certain conditions as a result of actions we have taken. Based upon the status of these flags, we can make decisions using the various Jump commands and we saw how this can be a useful thing in allowing us conditionally to execute parts of our code. In addition, we looked at the Shift operations which allow us to move bits to the left or right inside a register. This has the effect of multiplying or dividing by powers of 2 but we also saw, in the case of the button click handler, that we can use the shift command to move the topmost 16 bits of a big register down into the lower half to allow us to perform comparisons on it. All of this gives us some powerful tools that we will be able to capitalise on in the coming sessions.
See you next time ...
 client area of the window. Start by creating a new project. Use the same names as before and add 4 buttons to the window. If you call the first one "btn0" and name the others accordingly, it'll make the code much more readable. Place the buttons anywhere you like on the screen but the result, when you run the program, should be to have them end up as shown in the llustration here.
  OnResize:

	UseData winMainProcedure

	Invoke pegObject, [hWnd], IDC_WINMAIN_BTN0, 0

	Invoke pegObject, [hWnd], IDC_WINMAIN_BTN2, 2

	Invoke pegObject, [hWnd], IDC_WINMAIN_BTN6, 6

	Invoke pegObject, [hWnd], IDC_WINMAIN_BTN8, 8

	Return (TRUE)

  ; End OnResize

  EndU
  pegObject Frame hWnd, idControl, pegPosition

    Local hButton, pBox : RECT


    ; 1. Get a handle on the button

    Invoke GetWindowItem, [hWnd], [idControl]

    Mov [hButton], Eax


    ; 2. Get the new size of the window's client area

    Invoke GetClientRect, [hWnd], Addr pBox
    ; 3. Get the required peg position

    Mov Ebx, [pegPosition]
JZ mnemonic.Jz .thisLabel, goAsm will assume that there is a label with that name earlier in the code and it will fail for that reason. We get around this by means of the "greater than" and "less than" symbols to specify explicitly whether the jump is backwards or forwards, respectively. It's optional, in the case of backwards jumps, whether you use the symbol but it is mandatory when you want to jump forwards.
Cmp and the corresponding Jz jumps to those labels:
    ; 4.  Jump to the relevant code

    Cmp Ebx, 0

      Jz >.position_0

    Cmp Ebx, 2

      Jz >.position_2

    Cmp Ebx, 6

      Jz >.position_6

    Cmp Ebx, 8

      Jz >.position_8
    ; An incorrect "pegPosition" parameter has been supplied.

    ; Return to the main code immediately with a False flag.

    Return (FALSE)
  .position_0

    Invoke SetLeft, [hButton], 4

    Invoke SetTop, [hButton], 4

    Return(TRUE)
SetLeft or the SetTop could conceivably fail. If you check EasyCode's documentation, you would see that failure of these methods causes a "False" to be returned in Eax, so really we should check that register after each call to these two methods and only if both returned a True should we return from pegPosition with a True value. However, I want to keep things simple, so let's leave things as they are.
  .position_2

    Invoke GetWidth, [hButton]      ; Get the button's current width

    Add Eax, [pegBorder]	    ; Add a border of 4

    Mov Ebx, [pBox.right]	    ; Retrieve the parent's width

    Sub Ebx, Eax		    ; Subtract the button's (plus border)

                                    ; width from it.

    Invoke SetLeft, [hButton], Ebx  ; Set the button's left position

                                    ; to the new value

    Invoke SetTop, [hButton], 4     ; Set the top position

    Return(TRUE)
  .position_6

    Invoke SetLeft, [hButton], 4

    Invoke GetHeight, [hButton]		; Get the button's current height

    Add Eax, [pegBorder]		; Add a border of 4

    Mov Ebx, [pBox.bottom]		; Retrieve the parent's height

    Sub Ebx, Eax			; Subtract the button's (plus border) height

    Invoke SetTop, [hButton], Ebx	; Set the button's top position to the new value

    Return(TRUE)
  .position_8

    Invoke GetWidth, [hButton]		; Get the button's current width

    Add Eax, [pegBorder]		; A border of 4

    Mov Ebx, [pBox.right]		; Retrieve the parent's width

    Sub Ebx, Eax			; Subtract the button's (plus border) width

    Invoke SetLeft, [hButton], Ebx	; Set the button's left position to the new value


    Invoke GetHeight, [hButton]		; Get the button's current height

    Add Eax, [pegBorder]		; Add a border of 4

    Mov Ebx, [pBox.bottom]		; Retrieve the parent's height

    Sub Ebx, Eax			; Subtract the button's (plus border) height

    Invoke SetTop, [hButton], Ebx	; Set the button's top position to the new value

    Return(TRUE)
EndF you need to close the Frame. With the four invocations in the "OnResize" handler and the new code in pegPosition, we are good to go. Compile it and run it, after ensuring that you have 4 buttons in winMain.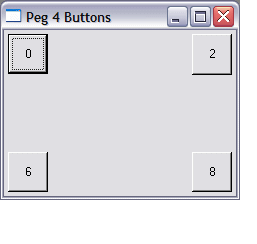
    ; 4.  Jump to the relevant code

    Cmp Ebx, 0

      Jz >.position_0

    Cmp Ebx, 2

      Jz >.position_2

    Cmp Ebx, 6

      Jz >.position_6

    Cmp Ebx, 8

      Jz >>.position_8
MUL and a DIV mnemonics for "multiply" and "divide", respectively, and "yes" you could use the latter to divide by 2. But there is a much easier way (and much faster).
Let's look at a decimal number line holding the value 256. You can see that there are 6 units, 5 tens and 2 hundreds, making 256. 

SHR and SHL instructions - right and left, respectively. However, because the number base is not 10 but 2, each place we shift the numbers multiplies or divides them by 2. That means if we want to divide, say, the contents of Ebx by 2, we would say:
SHR Ebx, 1
 as you can see in the illustration on the right. So how are we going to tackle this? One step at a time. Let's start by going to the window designer in EasyCode and putting in all the extra buttons, named "btn0" to "btn8". Then go to the code for the "OnResize" handler and add all the relevant calls to the pegPosition routine:
  OnResize:

    UseData winMainProcedure

    Invoke pegObject, [hWnd], IDC_WINMAIN_BTN0, 0, 4

    Invoke pegObject, [hWnd], IDC_WINMAIN_BTN1, 1, 4

    Invoke pegObject, [hWnd], IDC_WINMAIN_BTN2, 2, 4

    Invoke pegObject, [hWnd], IDC_WINMAIN_BTN3, 3, 4

    Invoke pegObject, [hWnd], IDC_WINMAIN_BTN4, 4, 4

    Invoke pegObject, [hWnd], IDC_WINMAIN_BTN5, 5, 4

    Invoke pegObject, [hWnd], IDC_WINMAIN_BTN6, 6, 4

    Invoke pegObject, [hWnd], IDC_WINMAIN_BTN7, 7, 4

    Invoke pegObject, [hWnd], IDC_WINMAIN_BTN8, 8, 4

    Return (TRUE)

  ; End OnResize

  EndU
    Mov Ebx, [pegPosition]

    Cmp Ebx, 0

      Jz >>.position_0

    Cmp Ebx, 1

      Jz >>.position_1

    Cmp Ebx, 2

      Jz >>.position_2

    Cmp Ebx, 3

      Jz >>.position_3

    Cmp Ebx, 4

      Jz >>.position_4

    Cmp Ebx, 5

      Jz >>.position_5

    Cmp Ebx, 6

      Jz >>.position_6

    Cmp Ebx, 7

      Jz >>.position_7

    Cmp Ebx, 8

      Jz >>.position_8
WM_COMMAND, which means we need to catch and handle it. So, let's call the handler "onClickBtn".
  MESSAGES	DD WM_CREATE, OnCreate

		DD WM_CLOSE, OnClose

		DD WM_COMMAND, onClickBtn
winMainProcedure parameters by means of the UseData command with its corresponding EndU. That will give us the same information that was passed to the main window when the event occurred. Take a look at winMainProcedure, noting the parameters. We have:
WM_COMMAND message. We can disegard lParam for our purposes, so that just leaves us with wParam. We need, therefore to get this value into a register so that we can process it a little further and compare it with known values. This is how we could begin coding the handler:
  onClickBtn:

    UseData winMainProcedure

    Mov Eax, [wParam]

    EndU

  ; End onClickBtn
IDC_WINMAIN_BTN1 and IDC_WINMAIN_BTN2, so we could do a CMP and a jump to help us move to the correct part of our routine to handle the specific button involved. If the ID is in the lower 16 bits of Eax, that means it is in the Ax part of the register.
  onClickBtn:

    UseData winMainProcedure

    Mov Eax, [wParam]

    Cmp Ax, IDC_WINMAIN_BTN1	; Is this button 1?

      Jnz >.notButton1

    ... ... ...

    Return (TRUE)


  .notButton1			; This is not button 1

    Cmp Ax, IDC_WINMAIN_BTN2	; Is this button 2?

      Jnz >.exitProcedure

    ... ... ...

    Return (TRUE)


  .exitProcedure		; This is neither button 1 nor button 2

    Return (FALSE)

    EndU

  ; End onClickBtn
CMP with the Windows constant BN_CLICKED. If the zero flag is set, we have a left click, otherwise we again jump to the ".exitProcedure" label and leave the routine by the fire escape. Here's the full routine, complete with the code to change the caption of the main window:
  onClickBtn:

    UseData winMainProcedure

    Mov Eax, [wParam]

    Cmp Ax, IDC_WINMAIN_BTN1	; Is this button 1?

      Jnz >.notButton1

    Shr Eax, 16

    Cmp Ax, BN_CLICKED

    Jnz >.exitProcedure

    Invoke SetText, [hWnd], "You clicked Button One!!!"

    Return (TRUE)


  .notButton1			; This is not button 1

    Cmp Ax, IDC_WINMAIN_BTN2	; Is this button 2?

      Jnz >.exitProcedure

    Shr Eax, 16

    Cmp Ax, BN_CLICKED

    Jnz >.exitProcedure

    Invoke SetText, [hWnd], "You clicked Button Two!!!"

    Return (TRUE)


  .exitProcedure		; This is neither button 1 nor button 2

    Return (FALSE)

    EndU

  ; End onClickBtn
Invoke command to call them. You can stick all these little routines at the bottom of "pegObject.asm". I will give you the solution in the next thrilling episode but, for now, here's a clue as to how many routines we'll need and suggested names for them:
|
|
|