Settings menu - Configuring Easy Code
Each assembler
must have its
corresponding ".cfg" file (Fasm.cfg, Fasm64.cfg,
GoAsm.cfg, GoAsm64.cfg, etc.) in
the
EasyCode\Config folder. but when you download Easy
Code 2 there is no ".cfg" file. Instead there is a file
with extension ".ori" (ori-ginal) for each assembler
configuration, as a reference for you to have an idea of what
to configure. Those files contain, among other values, the
paths and command line options for each assembler, linker,
resource and library compilers, and for each project type.
Once again, all paths are referred to the root of drive C:\
for simplicity, but as said before they should be in any other drive
or path. You just have to take into account the paths where
you have the corresponding tools and set the right path for each
tool in the Paths
and
command line options, as we will see later on in
this
section. Once again, using the system drive C: IS NOT
recommended, specially on Window 8.1 and Windows 10, because
of the permissions restriction.
When Easy Code starts, it
checks whether each
"ori" file has its "cfg" equivalent file. If the "cfg" file already
exists nothing happens, if not, it makes a copy of the "ori" file
but with the "cfg" extension. Doing so makes "ori" files always
remain unchanged and avoids ".cfg" files to be created more than
once (overwritten). If you already ran Easy Code, you can see the
".cfg" files in the "EasyCode\Config" folder.
The Settings section is
available through the Tools-->Settings menu
and it
displays the following window:

Several options allow you to customize the editor and the Easy Code panels (Project Explorer, Properties Window and Output Window).
Colors
Font
Automatic indentation
Autocomplete Procs, Macros and Structures
Context help for variables and constants
Context help for functions and macros
Context help for structures (not yet implemented)
Highlight API constants and structures
Convert tabs to spaces
Hide selected text
Show collapse buttons
Show line numbers
Show selection bar
Draw line after EndP / EndM / EndS
Draw vertical lines in tab positions
Tabulation size (in spaces):
Right Margin:
REMARKS: The editor may scrolls slowly
in old computers. If so, try to uncheck the
Highlight API constants and
structures option.

Here you can
specify whether
(and how) the syntax for different keywords will be
converted.
Compiler
Checking the Default
conversion option (recommended) means that compiler keywords
will be converted to the same syntax as they have in their
corresponding configuration file.
API functions,
constants and structures
Checking the Convert
to API case option (recommended) will convert all API names
to their right syntax.
Convert procedures,
macros, structs and variable names
Checking
this option (recommended) will convert all mentioned
names to their right syntax.
Enable
syntax hightlighting
Specifies whether keywords
will be highlighted or not.
Beautify syntax
Specifies
whether Easy Code adds or removes blanks to beautify the
syntax.

The Configurations
tab
is the most important part of the whole settings, as it is
where all assembler configurations are properly set in order
to work fine and without errors.
The Configuration
combo box selects the configuration to be inspected
or modified. Once a configuration is selected, you can choose
the text encoding in the Text encoding combo box.
ANSI text is the default value (recommended) and does not
affect to the code editor,
which always works in Unicode mode, but you can
choose
any other encoding method if you like, ONLY IF it
is supported by the
corresponding compiler. Otherwise, errors will be fired when
compiling the source code and the project will not be built.
On the other hand, there are ten groups of different
colours where you can add or remove keywords (keywords
coming by default are the ones supported by the compiler being
configured) taking into account that keywords will be
highlighted with the colour of the group they are included in (
of course you can change the colour of each group at your
own).
IMPORTANT: When new keywords have to be added to one
or more configuration files (.cfg), Easy Code will
include those new keywords in the corresponding .ori
files. The .ori files are distributed with Easy
Code
and ALWAYS must be in the Config
subfolder. If
there are new keywords for the selected Group of
the
selected Configuration, the Update
button will
be enabled so that you can update the corresponding
Configuration file (.cfg),
otherwise the
Update button will be disabled. When you click the
Update button the new keyword(s) will be added to
the
corresponding Group and they will appear at the end
of
the keywords list box, which will enable the OK and
Apply buttons. Finally, by clicking any of those two
buttons, the new keywords will be added to the corresponding
Group of the corresponding Configuration
file
(.cfg) without modifying anything else.
Now you have to specify the right paths for
the assembler you are configuring. If there is any project loaded
please close it, then click on the
Paths and command line options button and the
following window will be shown:
It is highly recommended to have no project loaded while setting the paths and command line options shown in the window above for any of the assemblers you are configuring.

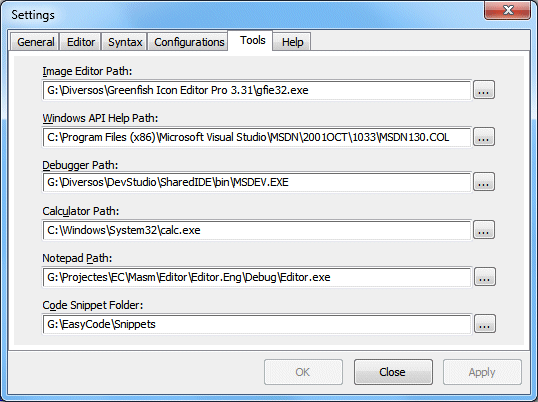
Here you can specify
the path
for:
Help
Tab - Configuring other help files

In the Help
tab you can
define up to six other help files (for opcodes, FPU,
MMX, etc.). By double-clicking on a label (Help
#1, Help #2, etc.) you will be able to
change its caption according to the related file to be
launched. The text for each label will be shown in
the corresponding item of the Help menu.
REMARKS: Each entry can specify the path to a
help file, or a web address (URL). Both, file or URL
will be printed in red colour if they are wrong. To
determine whether a path conforms to a valid URL format
or not, the PathIsURL
API function is called.